
Summary
The following document is a collection of information I discovered while reverse engineering Golang binaries. This is specific to the context of malware and generally speaking, stripped binaries. The target audience is for those trying to make sense of a stripped golang binary via IDA Pro.
There are in depth discussions on many of these topics, however, the goal here was to get right to the point of what you may run into and how that manifests within the disassembled binary that you see in IDA Pro.
Static Linking
Golang statically links its dependencies making binaries very large. A one line Go program can be several megabytes in size. This adds quite a lot of library code that you don’t want to be reversing into. As of IDA Pro 7.6 the support for Golang is substantially better and can assist in identifying these libraries and rebuilding the PCLN.
At the time of this post, we are at version 8.3 and many of the plugins that were created to assist in reverse engineering Golang binaries are now obsolete and not needed.
PCLN / PCLNTAB
This acronym stands for Program Counter Line (Table). In Go, there is a concept of “LineTables” which is a structure that will map a program counter (PC) to a line number in the code. You can think of this like an Import Address Table (IAT) in a normal PE file.
Part of what IDA Pro 7.6+ can assist with is reconstructing this PCLN table and mapping all the Go library functions properly to make it clear where they are. In the “Functions” view of IDA Pro you can right-click in the columns header and select the “Show folders” checkbox to see the functions categorized into folders.
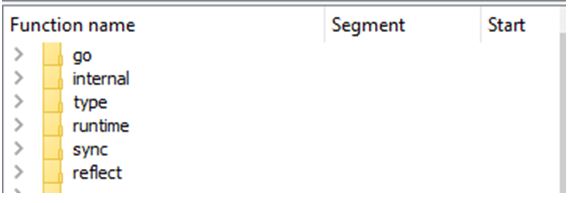
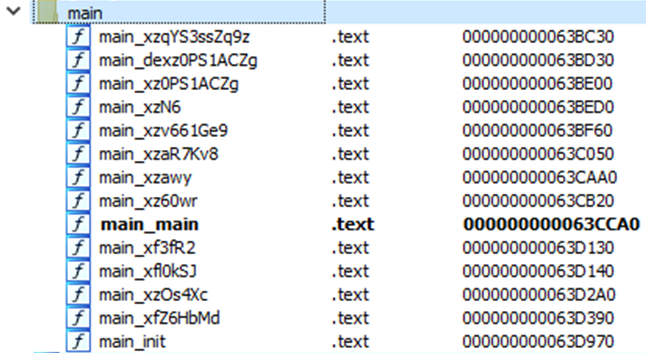
The user code of interest should be categorized in the “main” folder as seen below.
NOTE: If you are not using IDA Pro 8.3 or later and functions are not renamed and categorized this way you maybe need to use Mandiant’s GoReSym or SentinelLabs’ AlphaGolang scripts to resolve them (and there are many others that can be found).
GoReSym
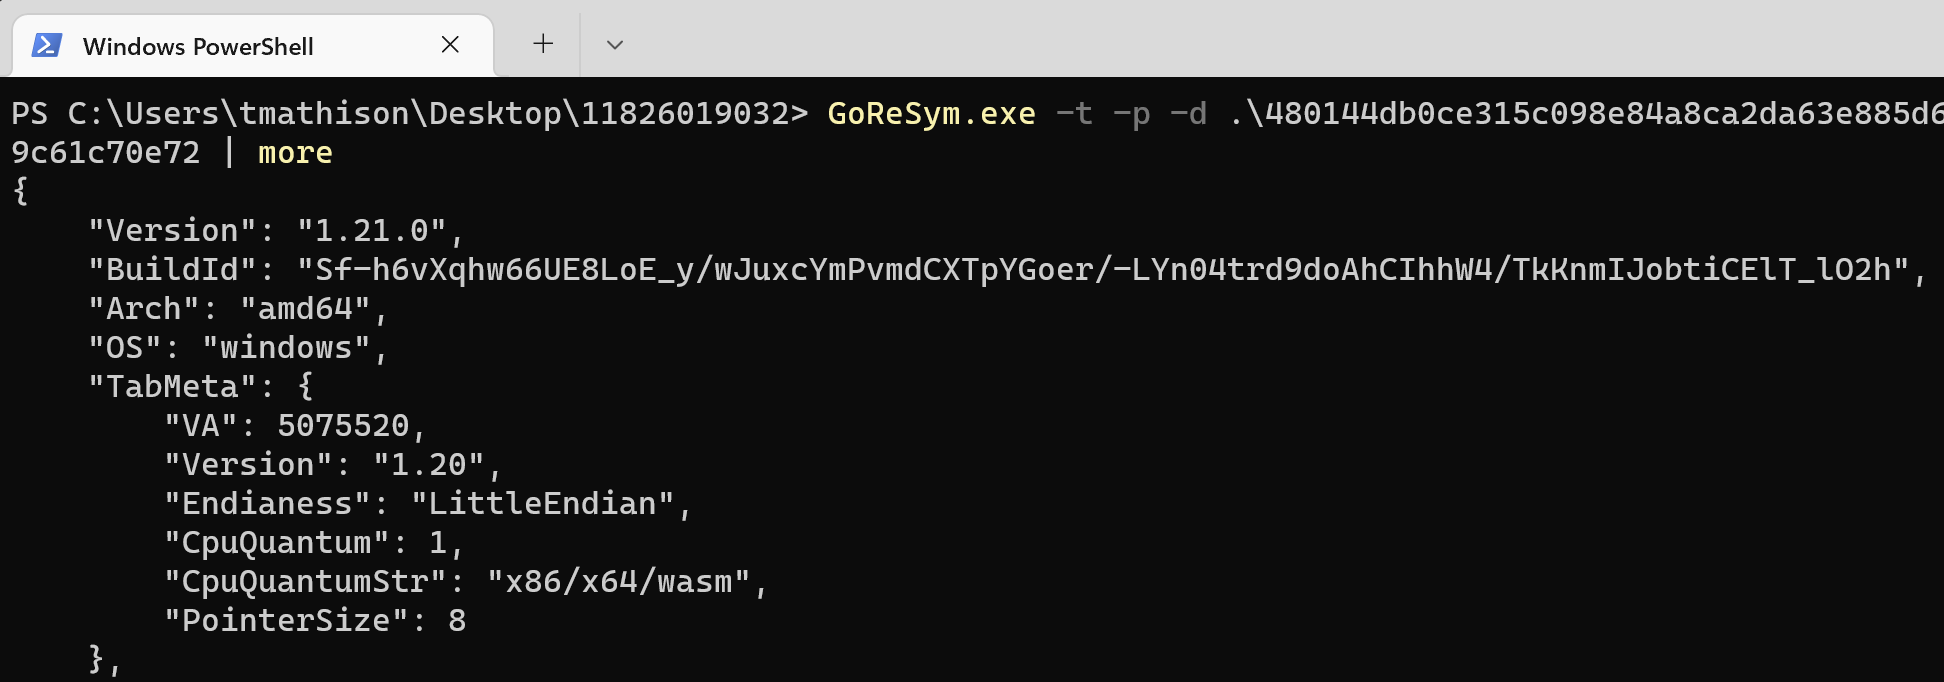
This can be found at https://github.com/mandiant/GoReSym and the tool should already be installed on FlareVM. There is a companion IDA Pro plugin script that can be downloaded from the GitHub repository and used to import the JSON file that the tool generates.
Simply run the tool against the Golang binary as seen below. For use with the IDA plugin, you should redirect this to a json file.
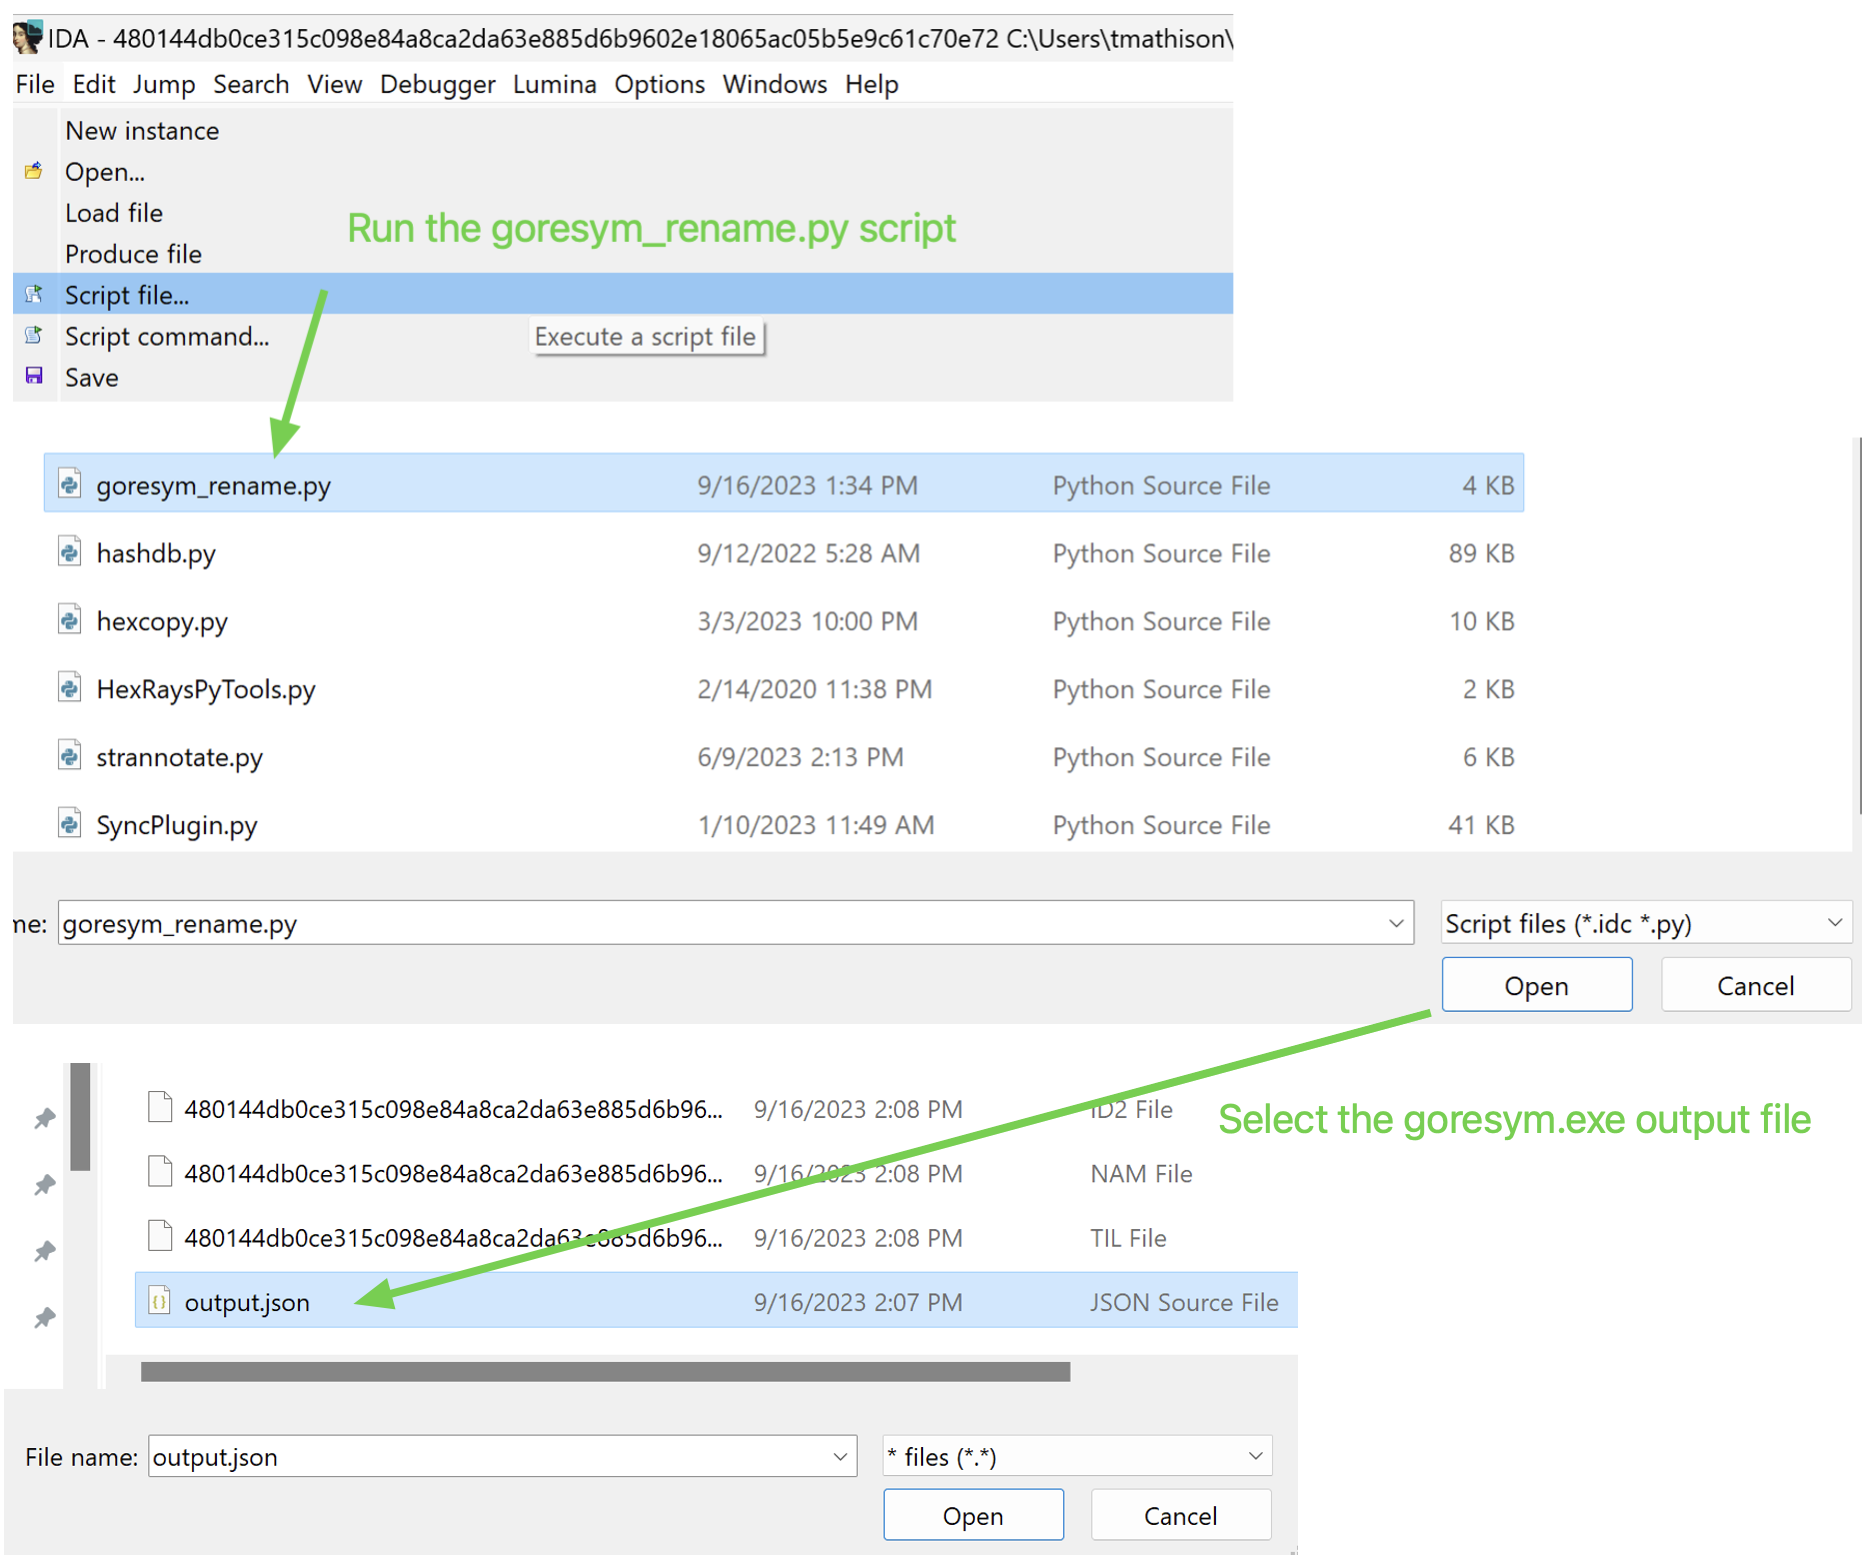
From IDA, you can feed this JSON file into the provided plugin and it will attempt to rename all the functions based on the information collected by the tool.
SentinelLabs AlphaGolang scripts
There are a set of scripts that SentinelLabs have provided that perform a number of tasks. As stated earlier, some of these are no longer needed in the current version of IDA Pro. The collection of scripts can be found at: https://github.com/SentineLabs/AlphaGolang
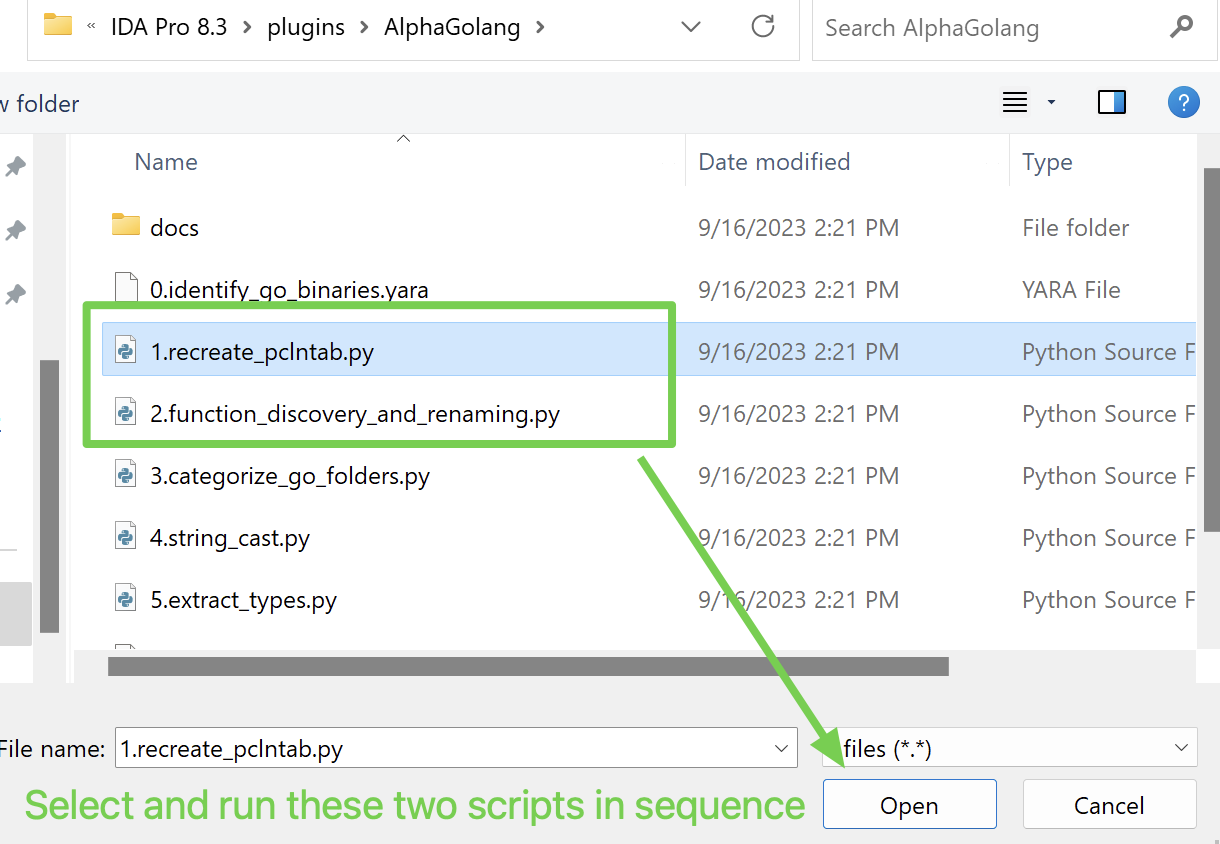
Similar to how we ran the GoReSym IDA plugin, we can run these two in sequence. These will effectively perform the same actions but in the form of two plugins.
Categorizing folders
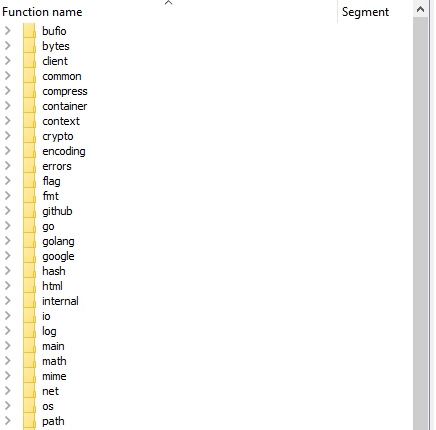
In the functions pane, you can turn on the folder view to see how the resolved sub routines were categorized (by namespace).

This will likely be a long list as seen below.
Among the SentinalLabs scripts is one that can further categorize this and make the folder view a bit more useful.
Select File->Script file... and execute the following script.
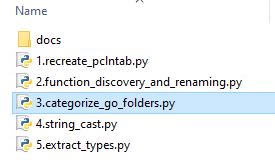
This results in a massive reduction of folders by bucketing everything into larger categories. Now you can focus on things in the client, main, uncategorized, and unnamed folders in a more targeted way.

A note on Lumina
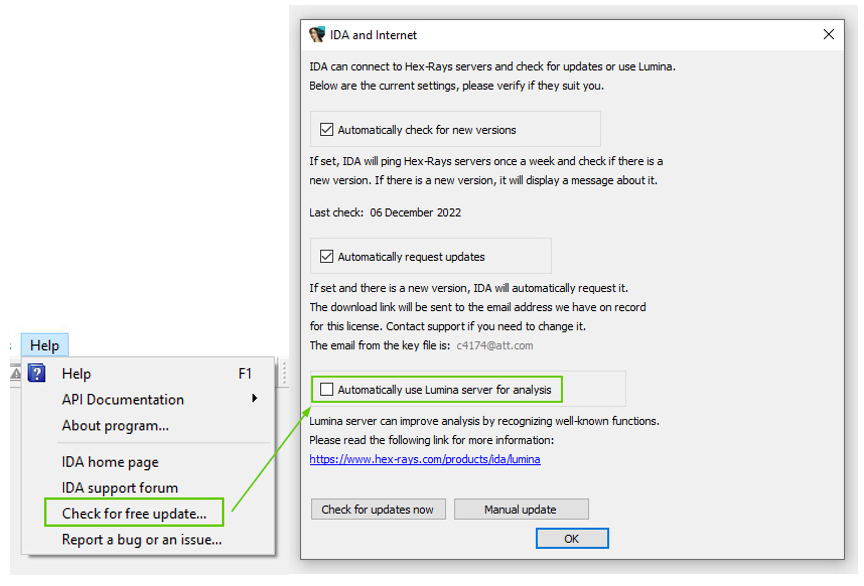
By default, IDA Pro will automatically use Lumina to pull anything that may be known about assembly fragments in your binary and import this information into your IDB. This is usually helpful. When resolving all the functions and types this could cause conflicts, however. You may wish to turn this off by default so that you can pull Lumina data on demand instead.
The location to toggle this behavior on and off is not in an obvious location. You can turn the automatic use of Lumina off by default via the following dialog.
Strings
In Golang, strings are not null terminated and are instead appended together into larger strings. The linker places all the strings in order of incremental length and Golang will index into this and specify the string length to parse out the string it wants.
An example of what you may see inside of the binary is a large string like:
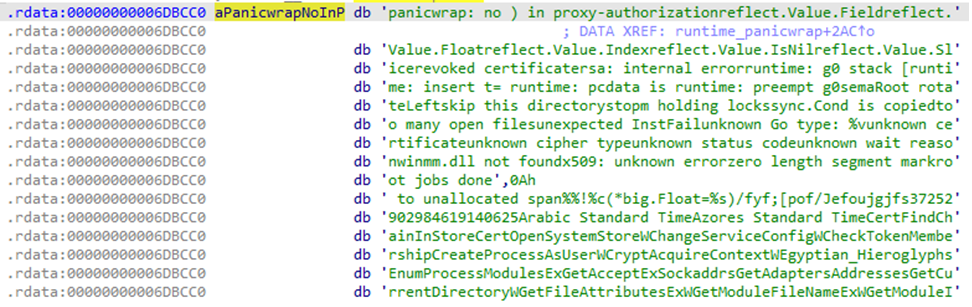
These strings may or may not be related in a direct way, but strings are extracted out as needed. When we look at the assembly from an example usage of this, we can see how Go indexes into it.
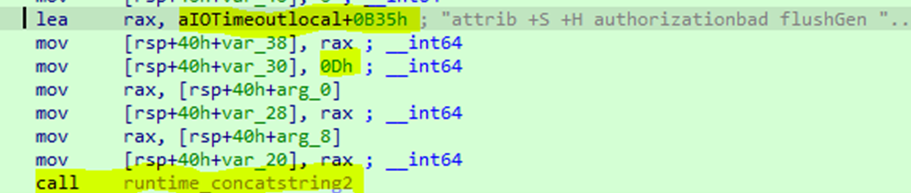
Go will load the effective address of the large string with an offset to the start of the string it wants. It will then specify how long this string should be (0Dh or 13, in this case).
Finally, you will see a call to concatstring2 that will use the information above to yank it out for use. This can be thought of Go just doing a standard substring operation.
Case Example
In the following example, we will look at how this appears in a real sample and a useful script that can be used to generate a variable from it. One IDA Python script you can utilize to help create new variables for specific strings you want to resolve is the “GoStrings.py” script from the following link.
https://github.com/sibears/IDAGolangHelper
You can load this into IDA Pro via File->Script file…
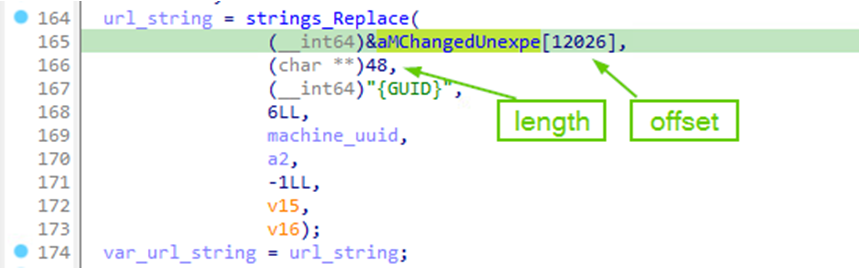
From here, you can call a make_string function with the format “make_string(base_addr+offset, length)”. We will see that in the next step. Below we can see a reference to the string blob with in offset into it and the length.
When you double-click the “aMChangedUnexpe” variable you can see the string blob and its base address.

You can now call the following function to make the string which was defined in the IDA Python script you just imported.

We now have a new variable that resolves to the correct string.

In many cases, I have found that it was critical to resolve strings to locate where they were being used. After resolving a string this way, you can check for all cross references to locate this (pressing the “x” key by default). When searching for all references to the base address of the string blob you will not see all of the usages which can be misleading.
In another SentinelLabs script, you can also attempt to perform some automatic string resolution. I have found this to be very hit-and-miss, however. That said, it can be useful to just see what you can get out of it and then know that you manually need to resolve others on your own.
File->Script file...
As we can see, it only works for some strings. This is why there are several scripts for re-creating strings and the “make_string” function from above is still useful.

Automatic stack creation at beginning of functions
At the beginning of a Golang function a small amount of stack space is reserved. It will continue to grow this via a “morestack” function call until it satisfies the functions requirements. You will see this all over the place and it can be ignored.
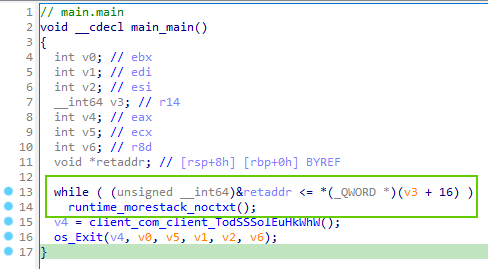
Multiple return values
Golang allows multiple return values from functions. When looking for return values you can’t simply be looking for what returned to rax, for example. The values will be saved to the stack and the caller will know to grab them from there. In Golang, the caller allocates the stack space for the return values and is also responsible for cleaning it up.
In the below example we can see that two values are stored onto the stack before the function call. Afterward, the stack variable rsp+0F8h+var_E8 is saved to rax. This was the return value in this case. Due to the caller being responsible for preparing the stack for parameters and return values you will likely see very large stack frames in functions with lots of calls.

Golang Type System
One of the things that you see very quickly are references to RTYPE’s. The main thing to understand is that Golang creates structures, enumerations, and interfaces to represent everything from primitive types to complex composite structures.
RTYPE` is a base struct that all other types inherit from and we can see the structure of it below.
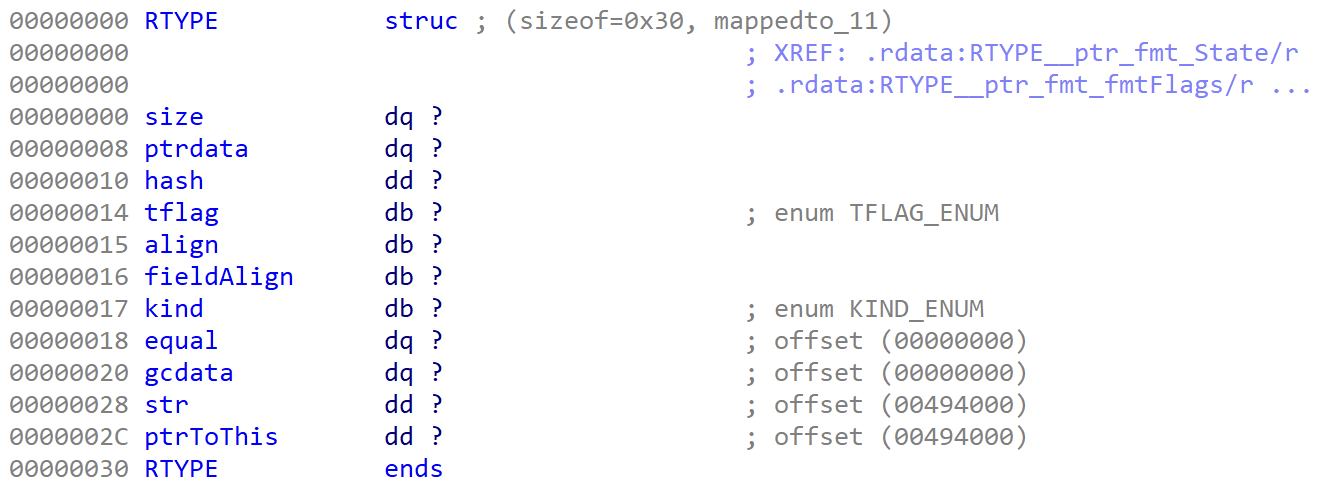
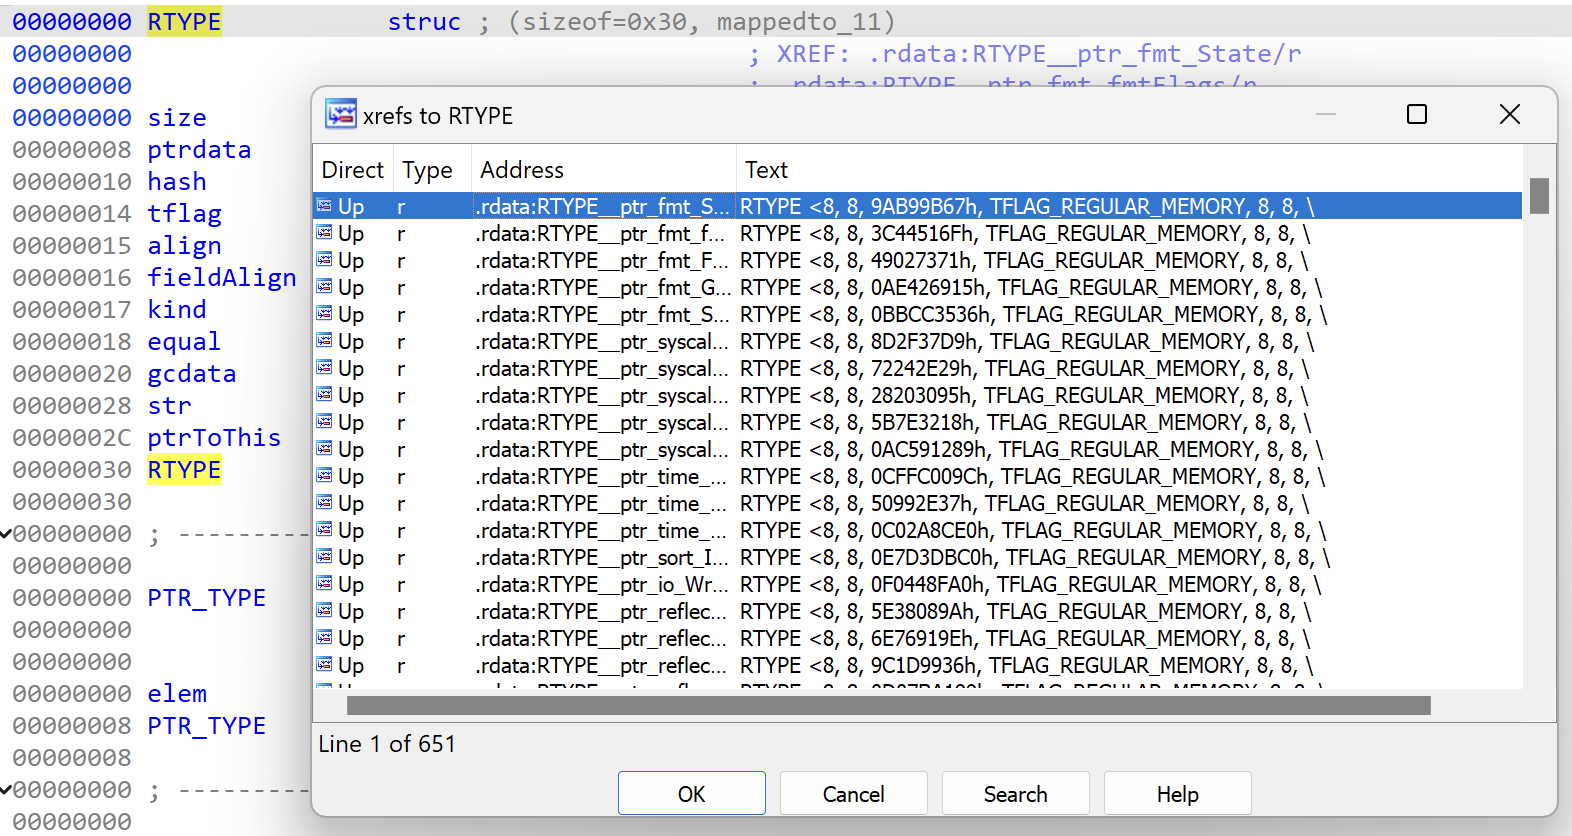
If you check for cross references from this structure, you will find hundreds of types that inherit it.
In the IDA Pro disassembly, you will see RTYPE’s being initialized and used as shown below. Since these all derive from the base RTYPE struct we’ll look into the format of the structure more.

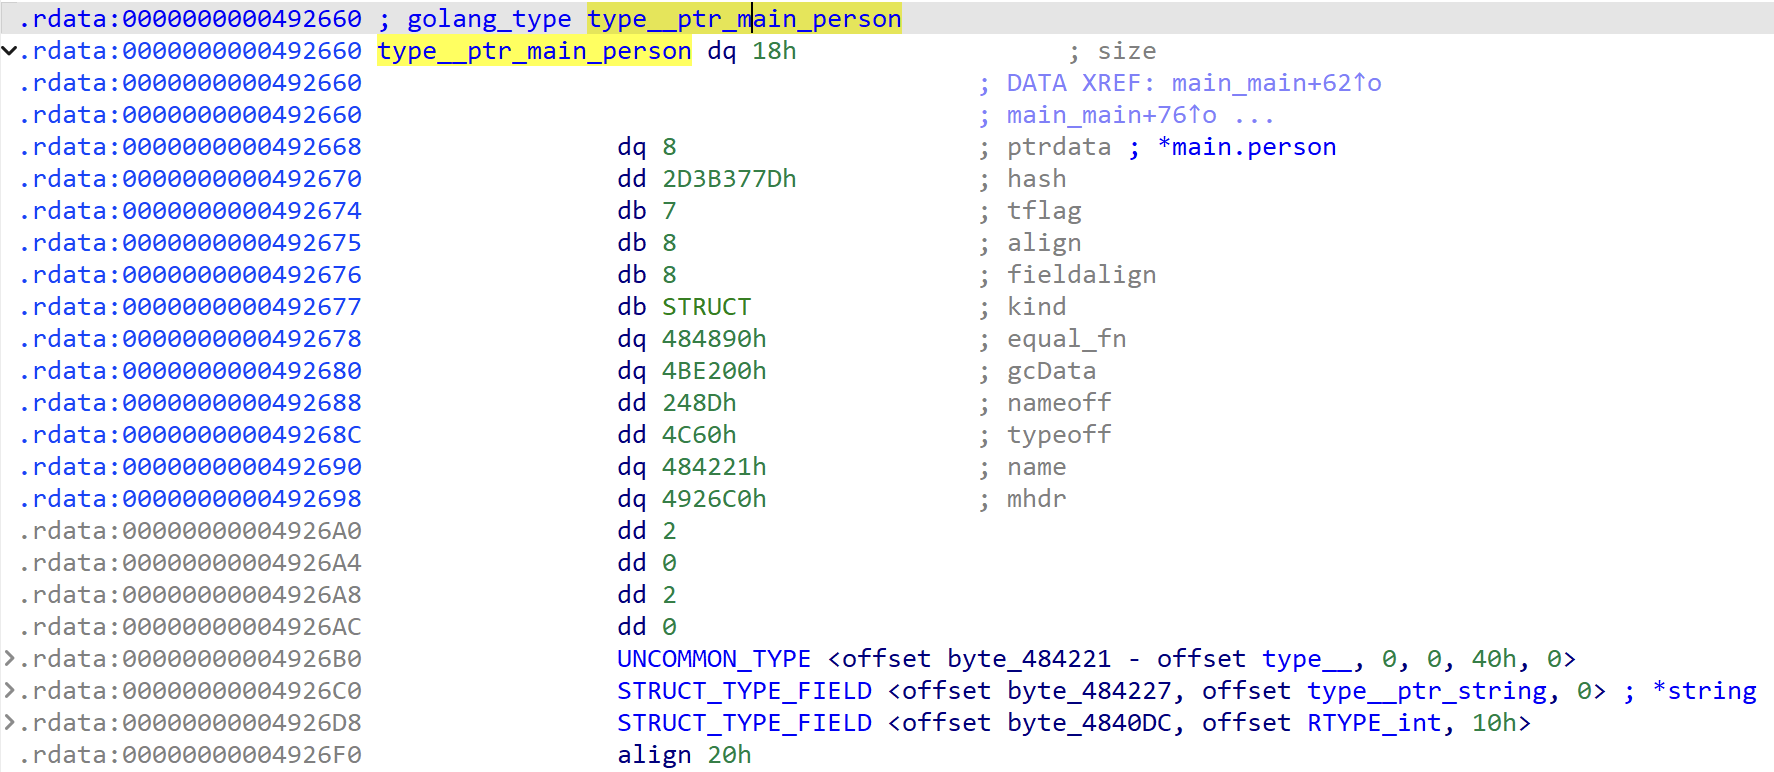
There are some scripts that can help clean it up a bit and we can see an example of a before and after when running yet another AlphaGolang script that cleans it up a little bit. A particular help is doing some of the address math in the fields.
As a simple example of what a small struct looks like when seen as a user-defined type in IDA Pro I created the following struct of which we’ll look at in IDA Pro.
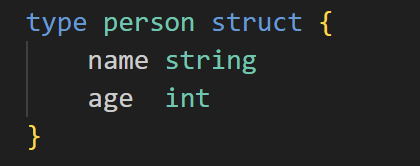
Before running the plugin
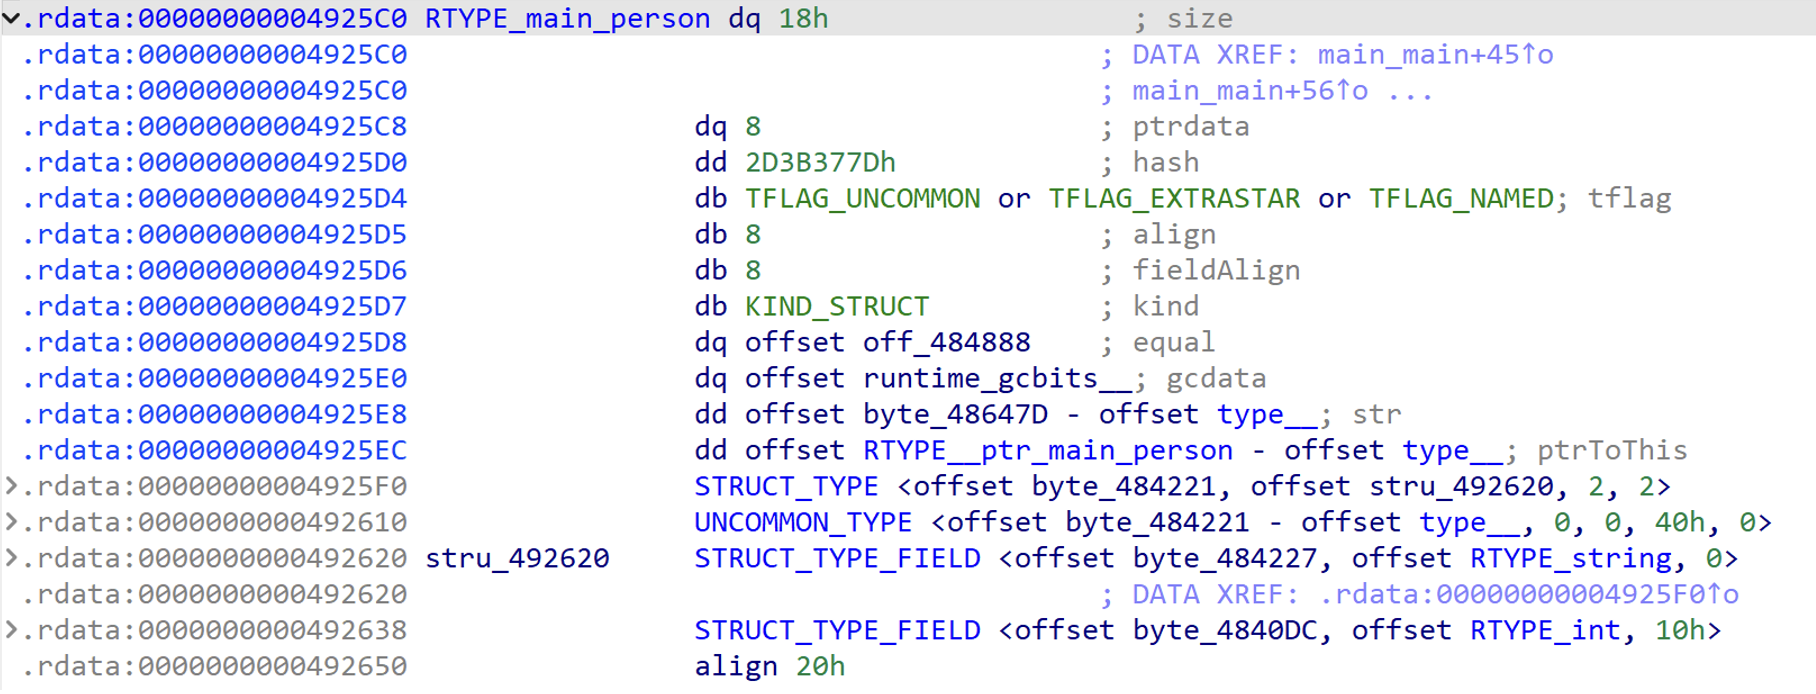
After running below plugin

The goal here is not that you have to understand everything about Golang or all its types (from a developer perspective). The focus is in what is it that we need to successfully understand and reverse engineering the usage of these types.
The key parts above that are useful to look at is the name of the object, the kind of type this is, and the defined fields and functions.
Type name
The name is structured as a namespace of module.object_name. This will tell you where it was defined so you know the module is coming out of. This can be a built-in type from Golang libraries, a third-party library, or a user-defined type.
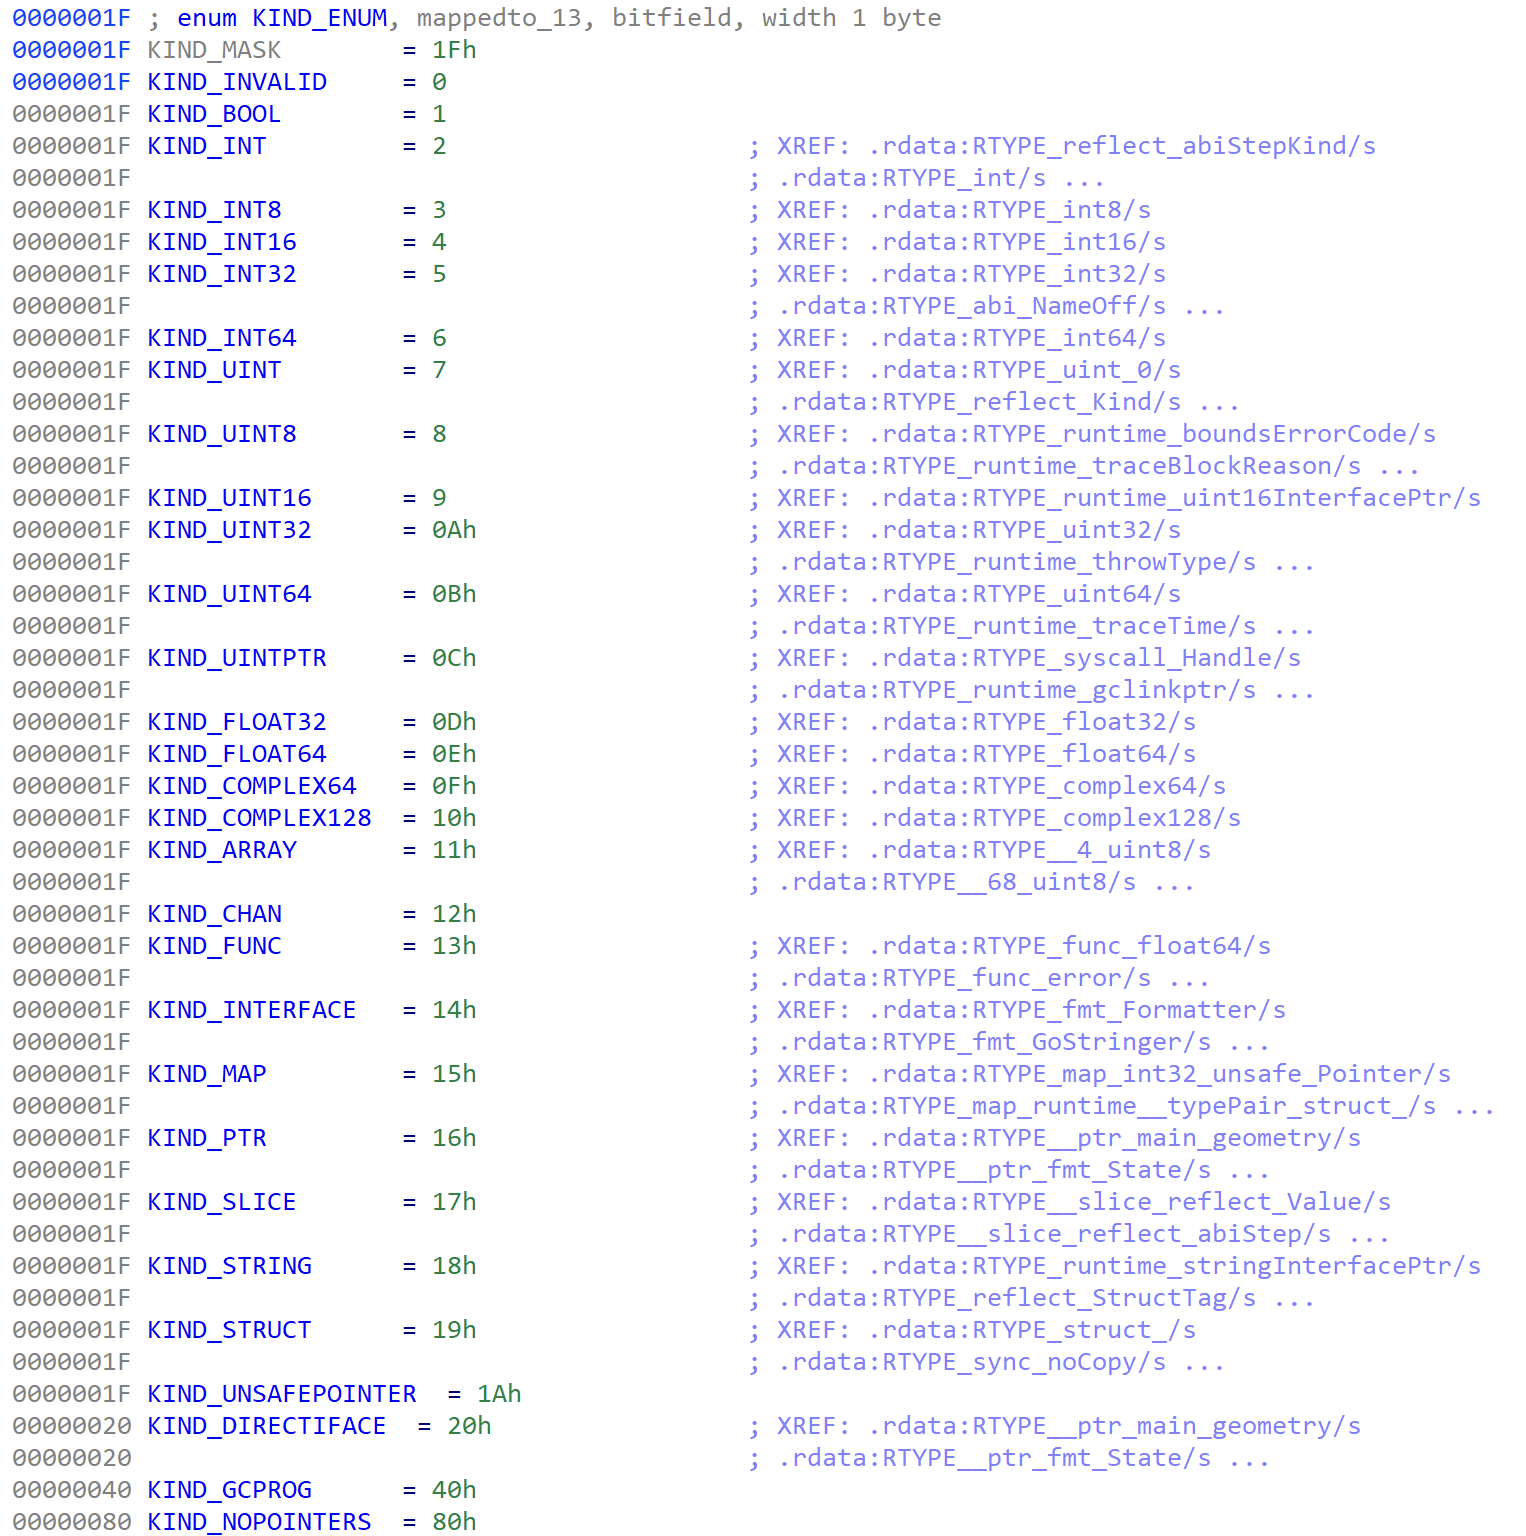
Type Kind
The type will define what kind of structure it is. If you double click on the enumeration type you can see the full list of types that could be present there. This is important as it can immediately give you an idea on how this is going to be used, how much memory will be allocated, and simply the context around what kind of data will be saved and read back out of this type.
Type fields
There can be zero or more fields to look at. In the above example we saw a few struct fields defined and can use the field struct definition to understand what properties it will attempt to define.


When looking at the first field we can see the three values that are set.

Expanded

We see an offset to the name of the field, an offset to the type of the field (another RTYPE), and a potential offset to stored data.
The second field was for an integer.

Expanded

Understanding the layout of the types being used will help to further understand all the data being passed to and from it when looking at the disassembly and decompiled code. I found it very helpful to create simple Golang programs with different types and observe how this looks inside of IDA Pro.
Links
I have listed a number of resources below that link to plugins and blog articles that I have found to be useful resources.
Plugins and/or scripts
- https://github.com/spigwitmer/golang_struct_builder
- https://github.com/sibears/idagolanghelper
- https://github.com/Titvt/GolangEnhancer
- https://github.com/strazzere/golang_loader_assist
- https://github.com/SentineLabs/AlphaGolang
- https://github.com/0xjiayu/go_parser
- https://github.com/leandrofroes/gftrace
- https://github.com/mandiant/GoReSym
- https://go-re.tk/